This project didn’t exactly go as planned. Well, it did, but I did not document it as I initially wanted to, so there is a bunch of info on the lower hull and not much for the turret. I do however have extensive comments to formulate on this kit, now that I have built it, so sit tight and read on.
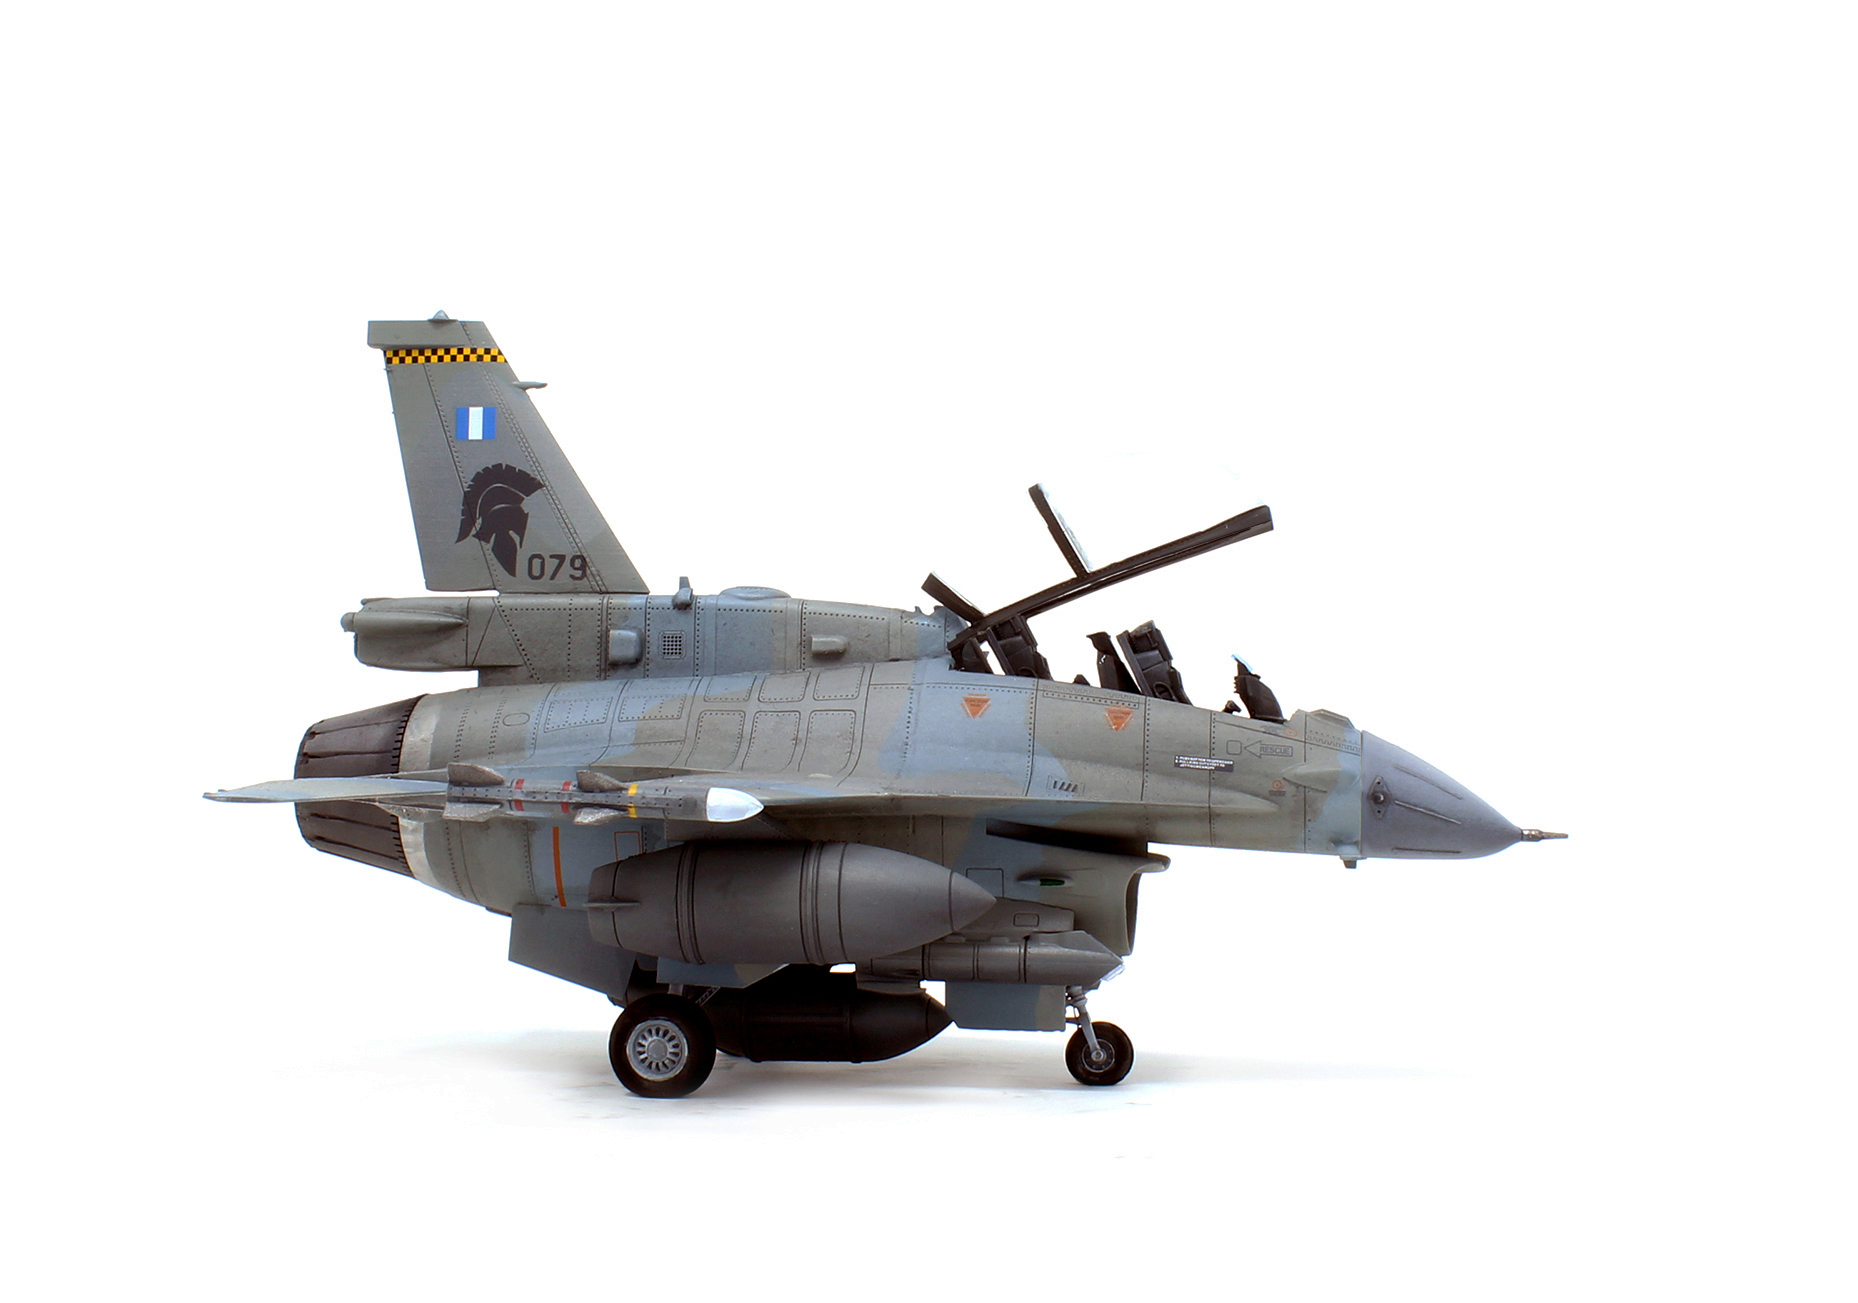
As I mentioned in the first part of this construction blog, I am going to represent a Belgian batch 3 vehicle, (the first sixteen vehicles Belgium received were batch 3 ). Revell’s kit is intended to build the more common batch 4 tank, but for some reason, I’m particularly fond of the initial engine exhausts of the cast, raised type.

I intend on building a vehicle inspired by a picture I’ve seen in Patrick Winnepenninckx’s Leopard 1(BE) Belgium’s Last MBT. On page 4, you can see a vehicle that is soon to go through its first update. What is notable about this vehicle is that it has been stripped of its tool clamps in order to receive the typical toolboxes that Belgian vehicles will soon be easily recognized for. Instead, you only see round bolts where the tool clamps would have been affixed. Those bolts remained in place underneath the toolboxes for the duration of the Leopard service life in the Belgium army.

The actual tank I’m building from the markings provided in Revell’s box is a tank that you can see on the same page of the aforementioned book, a tank from the 4 Lanciers stationed in Soest, Germany.
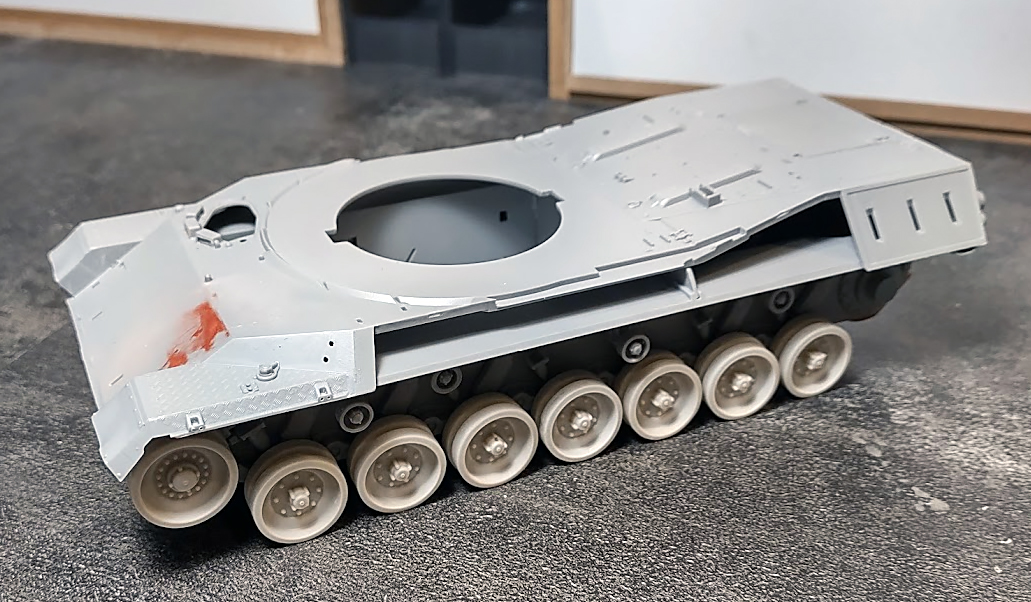
The Lower Hull & running gear – Nothing fits perfectly.
Having no previous experience with Revell, I didn’t know what to expect in terms of overall quality, engineering, and ease of build. I was aware, however, of a certain reputation for sometimes having sub-par kits. I soon found out working on the lower hull.
Basically, nothing fits perfectly. It all fits okay-ish, but there are gaps all over the place that you need to address, and few parts fit with any authority. The hull is a multipart affair for which I see no good reason.
I decided to at least smooth the sponsons’ undersides a little to avoid an unsightly step from the hull side to the sponson.
Upper hull – Unnecessary work.
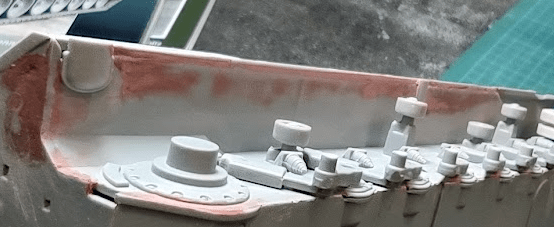
This one pic that says it all. here again, you need to add separate hull side slabs. This is likely to allow for variants, but it induces substantial filling work.

Since I did not intend on mounting the tools, I also had to fill all those massive mating notches intended for the tool clamps.
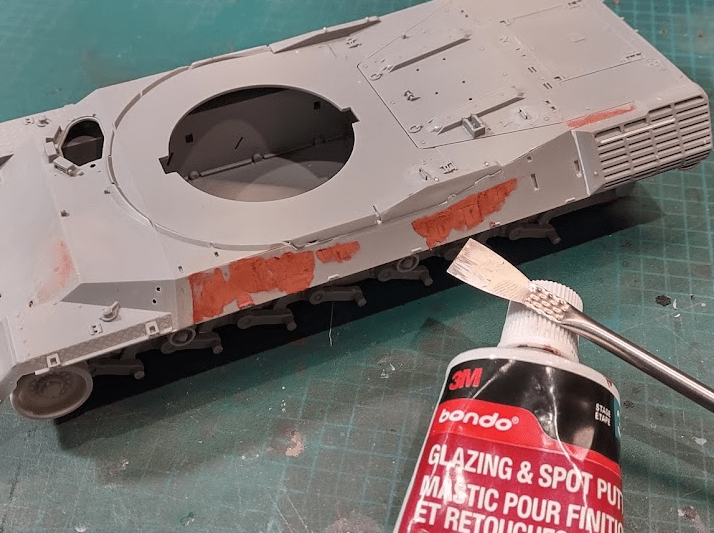
Another addition you may consider is to add weld seams. I did that using the putty method, which I am still getting a hold of, and here they look slightly inconsistent, sometime slightly too prominent. Still, I consider this a great addition. I added them on most parts of the vehicle where necessary except on top of the exhaust grille.
On the picture below you may also notice that the driver’s periscopes are pretty thick. I left them as is, but this is another point that could benefit from being replaced. Note that I also removed the kit’s molded-on fording plug chains. They will be replaced with PE ones from Leopard Club.
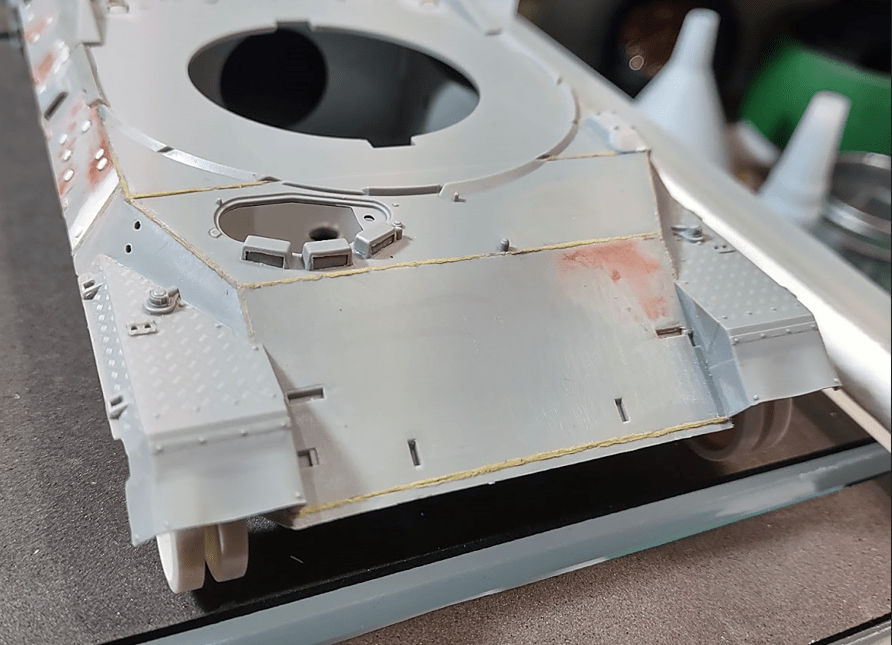
Below, you can see the hull more or less finished, with the punched styrene round bolts in lieu of the tool clamps. Some filling and weld seams were added, too, especially the thicker beads on the forward hull side.

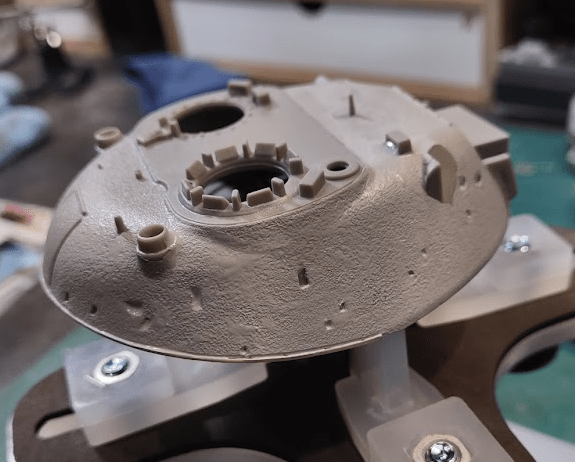
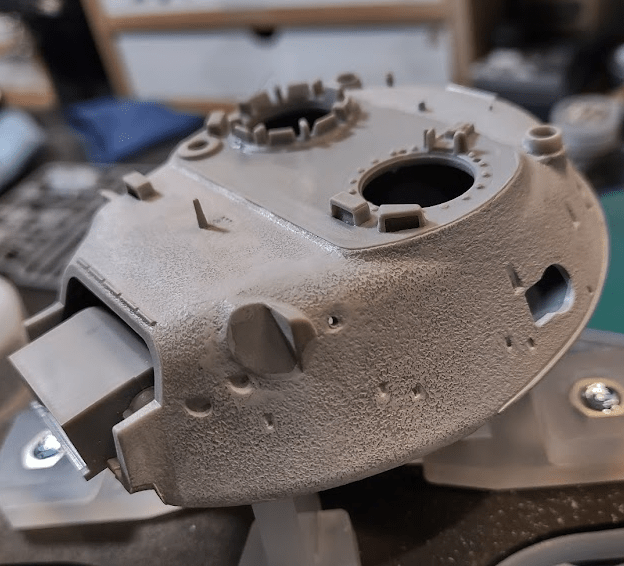
I also detailed the kit’s NBC intake (I only remembered I had one from Leopard Club after the work was done!). I simply added bolts on top and a grill on the inner side. On these pictures the round bolts are too thick and have been replaced since.


Hull Rear
I don’t have many pictures of the hull rear, only this one, at the beginning of the work there. I removed the rear light stubs in order to replace them with the much nicer ones from Leopard Club. I also added weld seams where necessary (not shown here). This portion of the build went relatively easily. The toolbox handle should really be replaced by a thinner handle, however.

Glacis – Getting rid of those pesky fording plug chains.
The fording plugs and the small chains that hold them are a constant characteristic of the Leopard 1, but are rarely present on a kit, and when they are, it’s a molded-on affair that doesn’t look very convincing. For good reason, I might say: it’s a hard thing to model.
I had Leopard Club replacements but I had doubts about my ability to install them convincingly. In the end, it went pretty well, as the final picture of the build will attest, and I must say, it adds a very nice detail. I should have done that on the Wegmann launchers as well!
Rear deck – Fuel and filter handle.
Some reviewers mentioned that the hull grill isn’t properly represented, and they are right. From a modeling perspective, however, I would say it looks nice and crisp so I decided to keep it, but if you are after a more accurate representation, consider swapping it for some PE one.
The only thing I did on the rear deck was to shave off the molded-on handles and replaced them with copper wire. On the air filter covers (the right-most one on the picture below), apparently, there are two such handles on earlier vehicles, but I couldn’t locate any reference for this and went with the more common single handle. I used 0.4mm copper wire but I think 0.3mm would be more in scale.

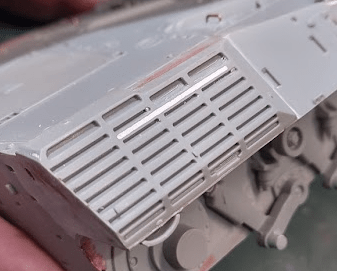
You also need to fill the curious and unnecessary groove on the exhaust grill.

The Turret
One of the main things to correct on the turret is the cast texture which is both unrealistic and too coarse. This, however, can be easily fixed with Mr. Surfacer applied on the turret and some gentle sanding. This will tone done the kit’s original texture and make for a much more realistic result.
Another thing that may benefit from a little enhancement is to carve the turret rain gutter a tad to give it more volume.

My Impressions on Revell’s Kit.
Some noticeable errors.
In addition to the extensive list of items that some previous reviewers mentioned (see part one of this series for reference), there are a few other points that I feel the need to mention.
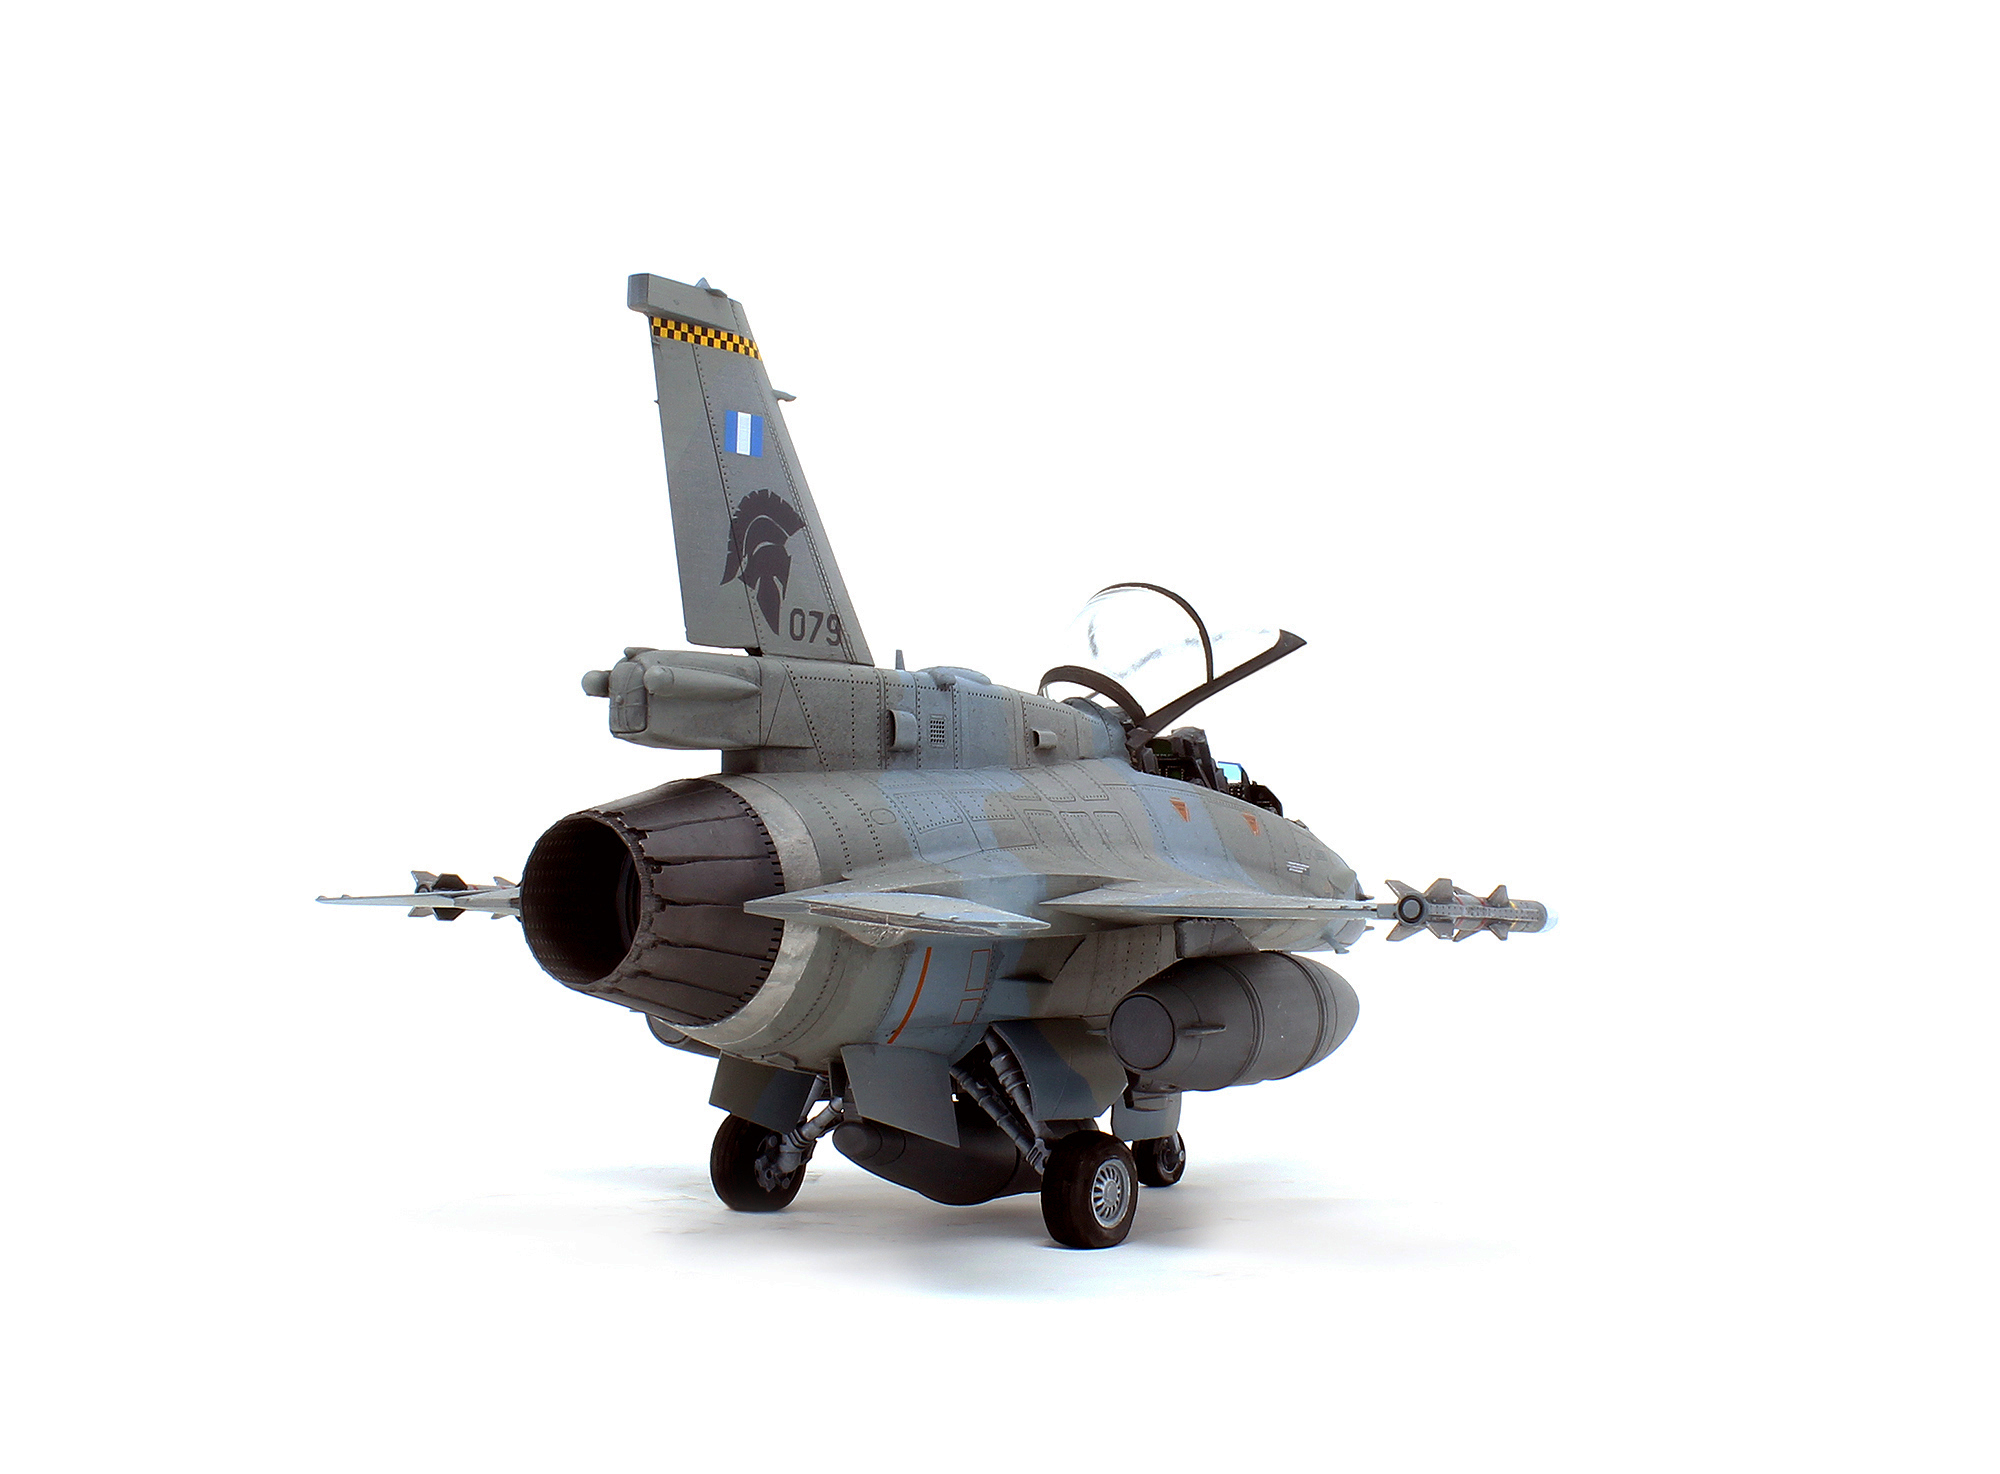
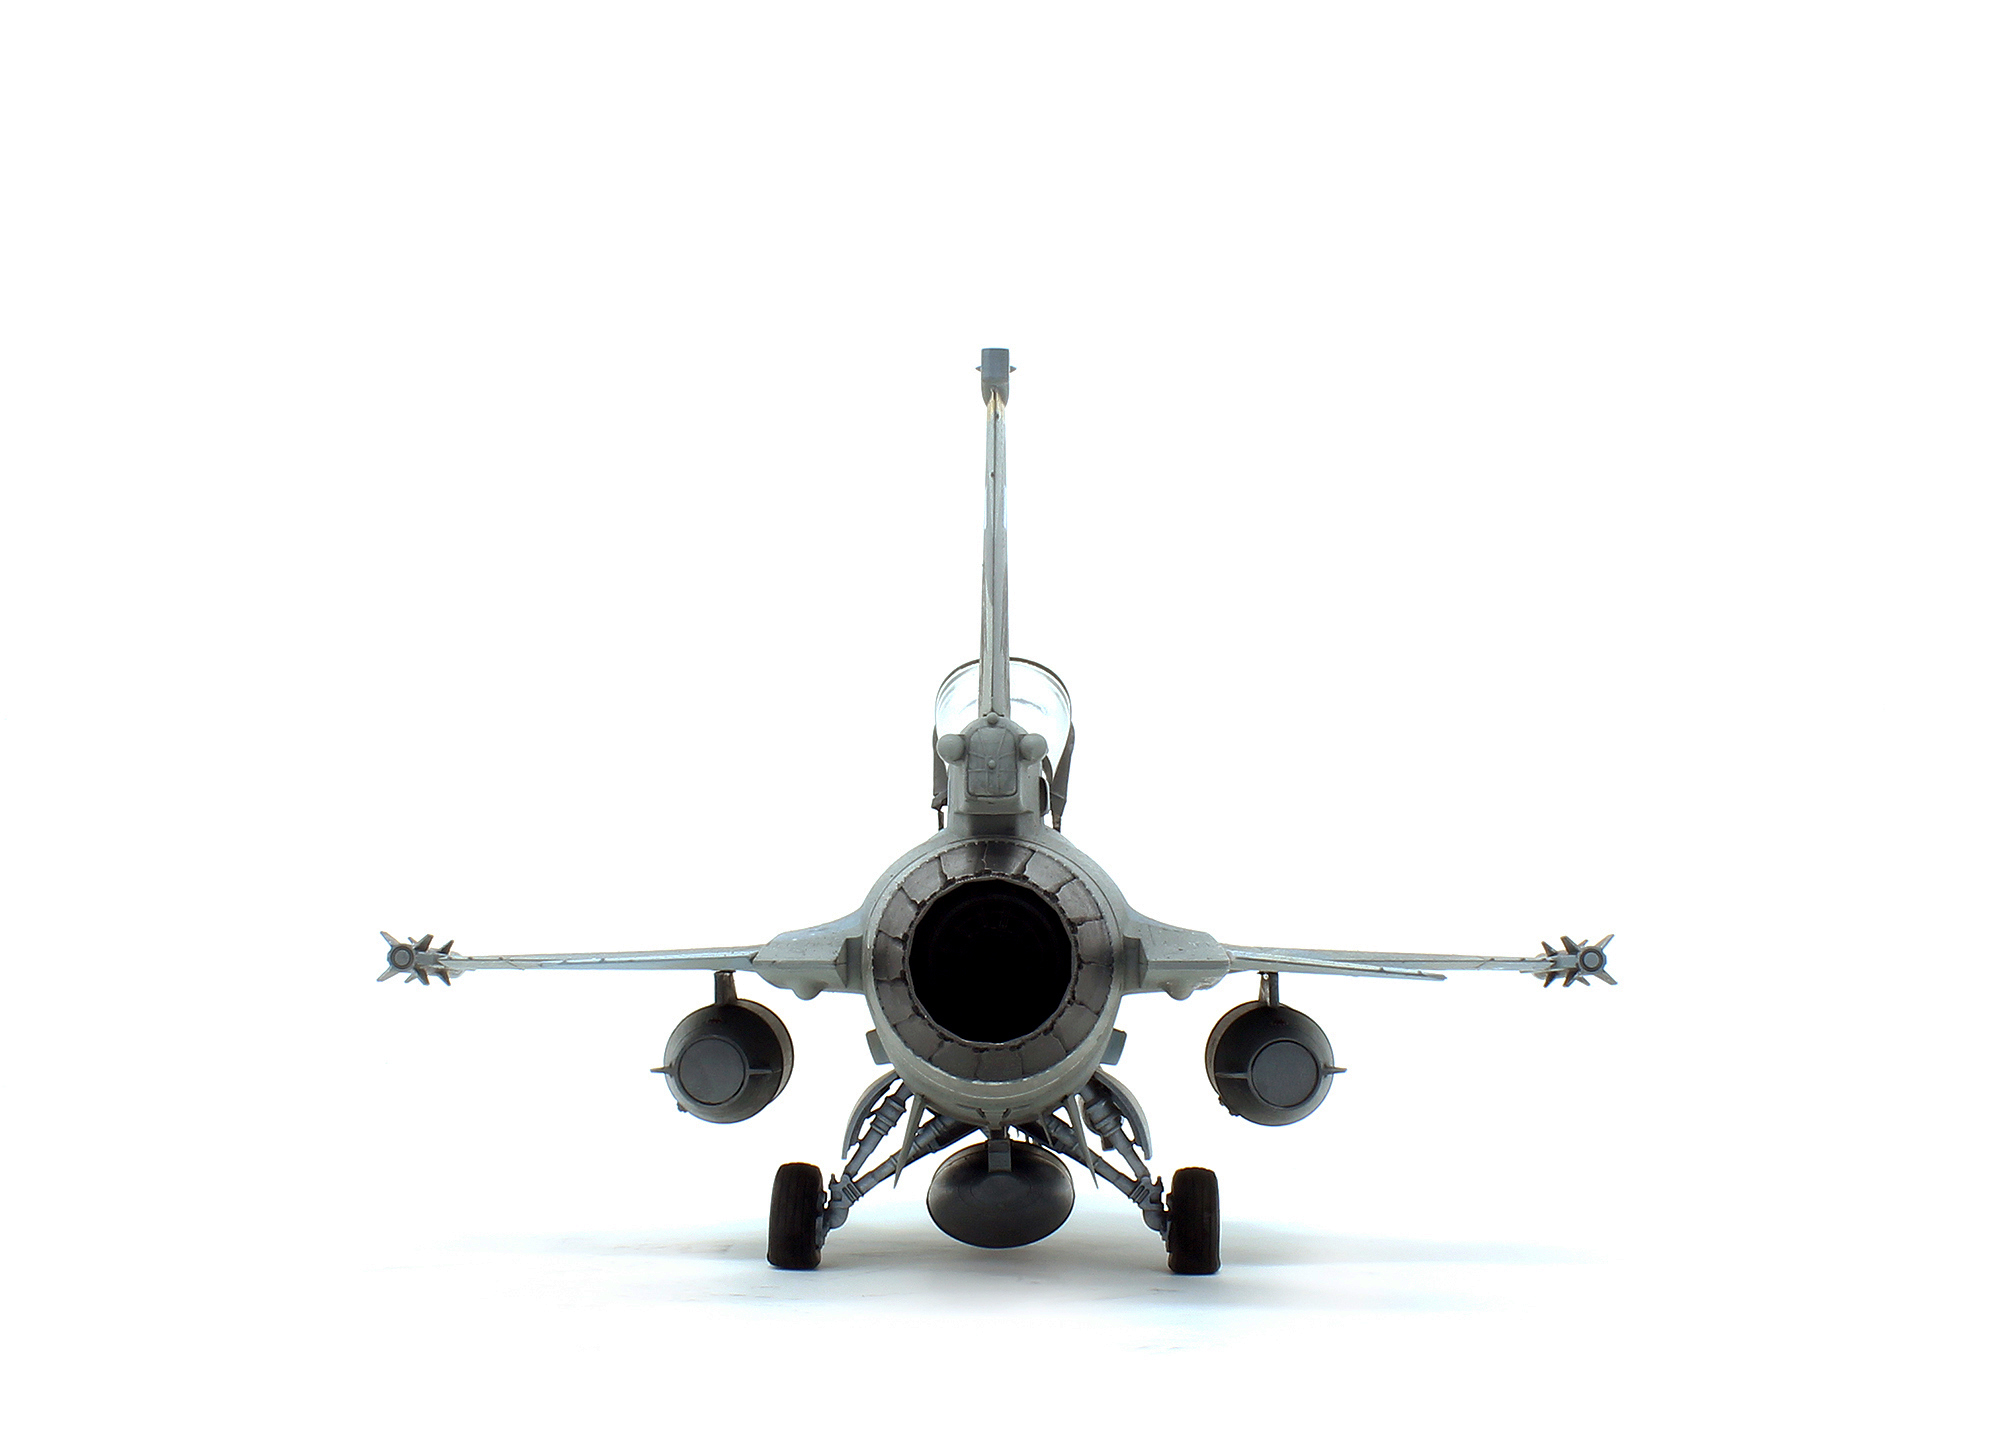
- The Wegmann’s smoke launchers are MASSIVELY oversized. Judging from Michael Shackleton’s drawings (Leopard 1A5(BE) from The Leopard Trilogy, Volume 3, p. 441, the overall diameter should measure 2,40 mm at 1/35 scale. The kit’s sit at 3,03mm. It’s pretty obvious once they are mounted on the kit.
- The same goes for the turret handrails and the rearview mirror posts. They are much too thick and I highly recommend you replace them. Both of these points make for a toyish look if you use the kit parts as I did. The turret basket bars are also too thick. In general, that’s the main thing about the kit: every bar and handle is always slightly out of scale, almost always on the thicker side. Consider replacing them all.
- The periscope covers are too thick as well. A good PE replacement would be simple to procure or scratch build and would add a lot to the turret top and driver’s station.
- I did not use the turret MG, as my target vehicle did not have one. I would have replaced it with an aftermarket one for sure, the kit ones are downright ugly!
Overall Thoughts
Revell’s Leopard 1 allows you to build an early Batch 3 or 4 Leopard 1, and it is the only mainstream kit out there that lets you do that. It’s also the only kit that lets you build a Dutch Leopard 1. With some work, you can obtain a pretty accurate replica, but by *some* work, I really mean a lot of work. Nothing is particularly complicated to do, but a lot of work nonetheless. There is a lot of things that you need to correct if you are after real accuracy. Some of those points are mentioned above.
As for me, I ran out of patience at some point and sprinted to the finish line, as I’m often prone to do, to get going on something else, and it shows. I did not take the time to address some of the more obvious issues and I’m left with a kit that looks okay-ish at most. I decided that my trajectory with it did not warrant the use of aftermarket tracks, but again, it shows. The kit tracks are not a good option. Vinyl tracks rarely are.
All this to say I did not find Revell kit a fun one. Not bad, but not fun. That’s mostly because I sit in a curious spot currently with my model building: As a busy father and professional, I do not have sufficient time to spend working on corrections, and I’m quite adamant when a kit requires me to do so. This is one of those kits.
Give it some real elbow juice and it holds the potential for a spectacular replica, but don’t cut corners!
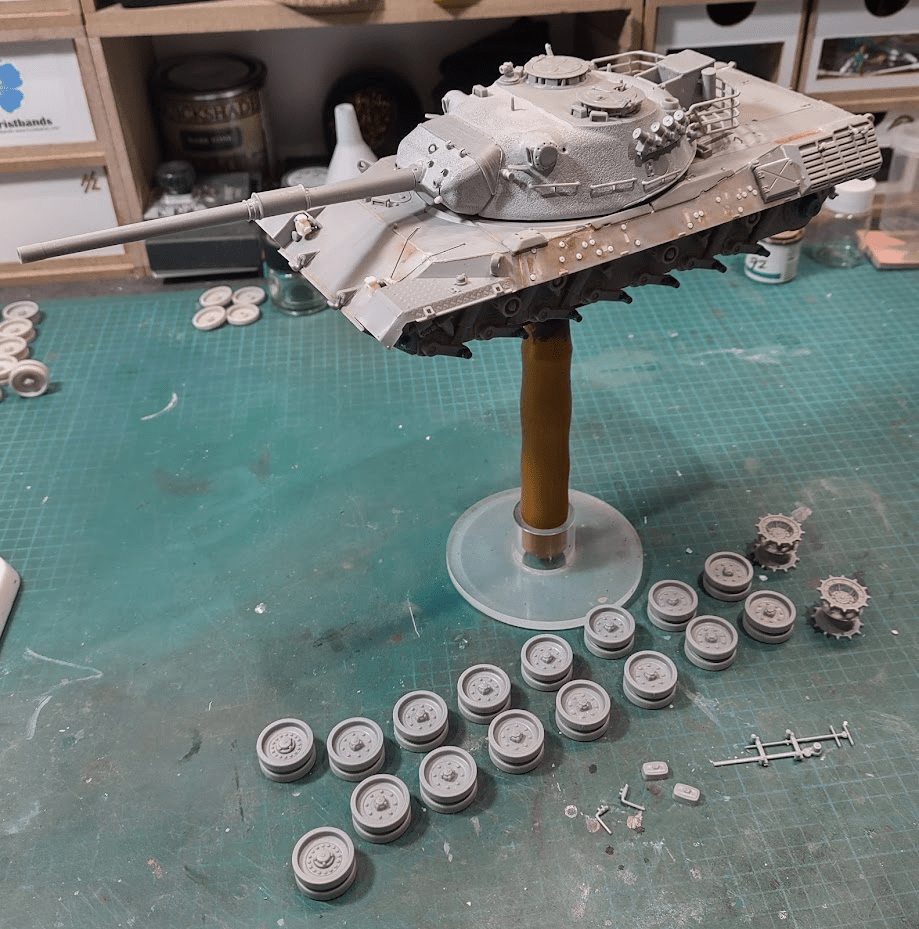
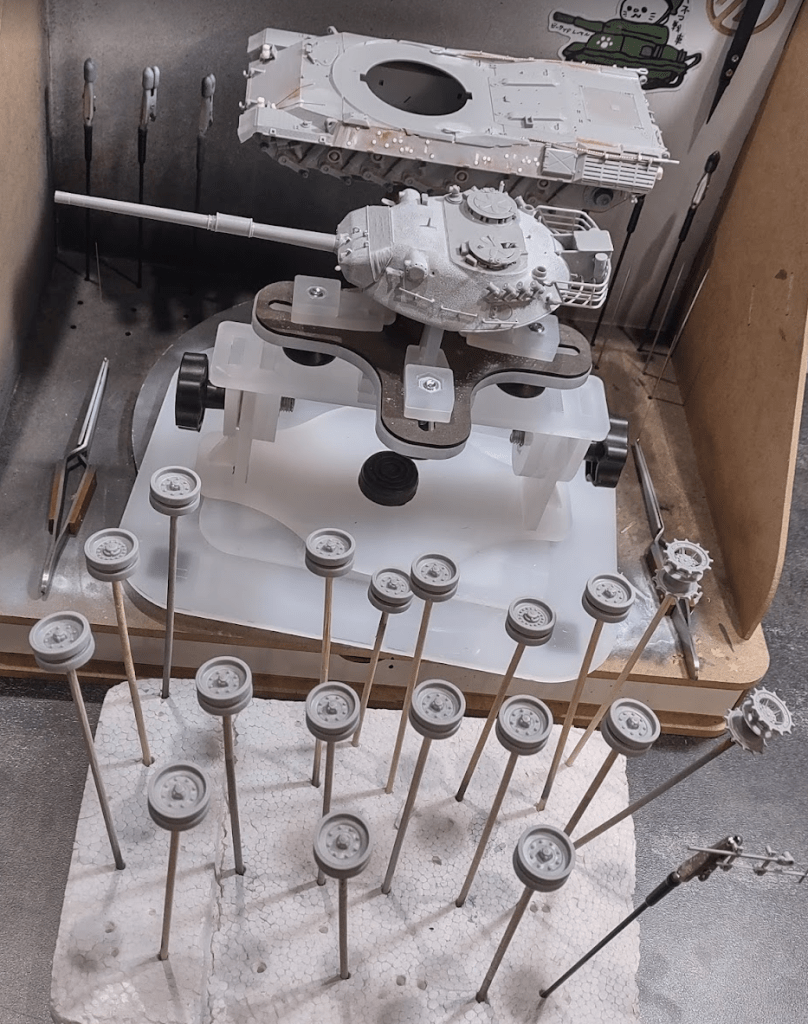
And now, onward to painting this cat!
Project Specs
Revell Leopard 1 (03240)
Leopard Workshop Leopard I Improvement Set LW033 (Did not use all of it, in the end.)
Leopard 1 Mantlet Plugs LW005 – I highly recommend this little set. It doesn’t look like much but it provides something rarely seen correctly modeled on the Leopard 1.
Leopard SEM25/35 Aerials LW023 – This, too, I highly recommend. A simple addition that goes a long way!
Eureka XXL Towing Cable ER-3507