This has very little to do with the main focus of this blog, but who cares? I’m going on a limb here and I’m going to build and, hopefully, upgrade a spaceship.
The subject is the Sanctuary 3, a 1/200 (?) model that was included in Borderlands 3 Diamond Loot Chest each Gearbox developer (including Yours Truly) was given upon the release of that most awesome game. It has been sitting in the stash for a while and I decided to get a shot at it, not because I’m particularly fond of sci-fi subjects but because after working on Takom’s SA-N-12 I thought this might be another cool practice mule. I’ve had this idea for a while, after realizing most Star Wars ships have many parts of Tamiya panzer kits. Any random pic of the Millenium Falcon, for instance, reveals any number of 1/35 and 1/72 armor parts.

The Project
So here we are. The project is fairly simple: I’ll build the ship straight out of the box, then I’m going to scratch a few additional details using only spare parts. I’m not going for a super involved thing with DEL flashing in the boosters, etc. I’ll only add a bit of definition and relief, so to speak. It’s the painting part, and most specifically weathering, that’ll get a full serving.

The Kit
The kit doesn’t sport a brand per see, but I’m willing to bet it’s Revell, simply because it’s a snap-tite kit that is absolutely like Revell’s Star Wars kit. The fit is excellent, with a tolerance that makes for just the right amount of friction to make the parts hold while still being easy to mate. It took me about an hour and I was careful cleaning some parts and adding glue here and there to get better bonds.
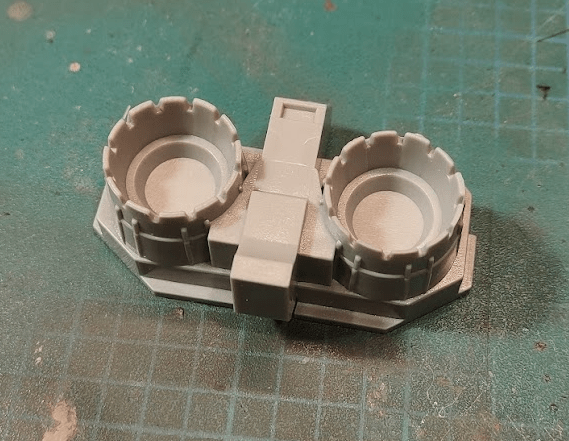
As you can see in the following pictures, however, it’s not exactly a detailed kit. It is crude on the details, but considering it was a piece of merch sold in a videogame deluxe package, it makes total sense: the focus here is to allow fans to quickly obtain a nice replica of the spaceship they spent a good amount of time running in and flying on. As such, it is very well engineered.


The real fun will begin once the assembly is complete and I get to kitbash this into a somewhat more credible vessel. I don’t plan on making this a super intense crazy thing, mind you, but just improvising this into something a bit more realistic and cool. We’ll see.
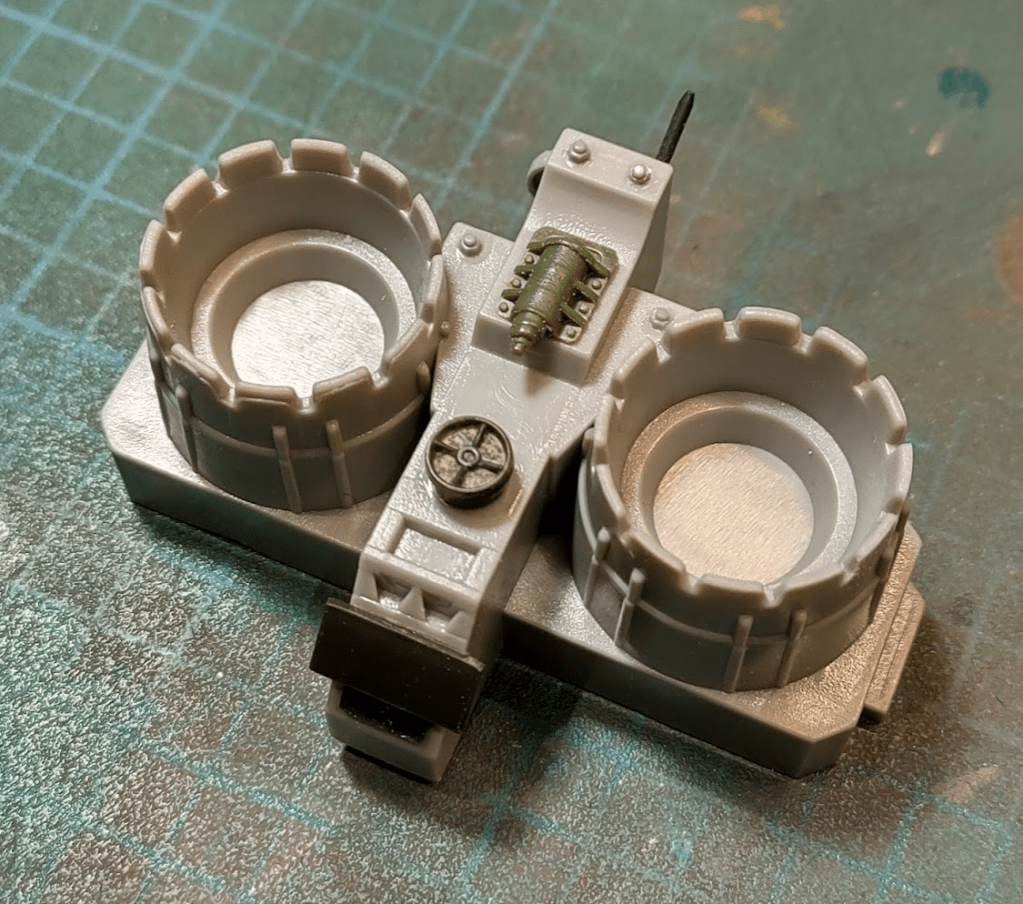
Just to give you an idea of what I’m going for, here’s the center rear booster assembly before and after. It took me, I don’t know, ten minutes. It’s not much, but I really want to see where this can get. Thank goodness the kit’s styrene reacts well to both Mr. CementS and Tamiya Super Thin.