
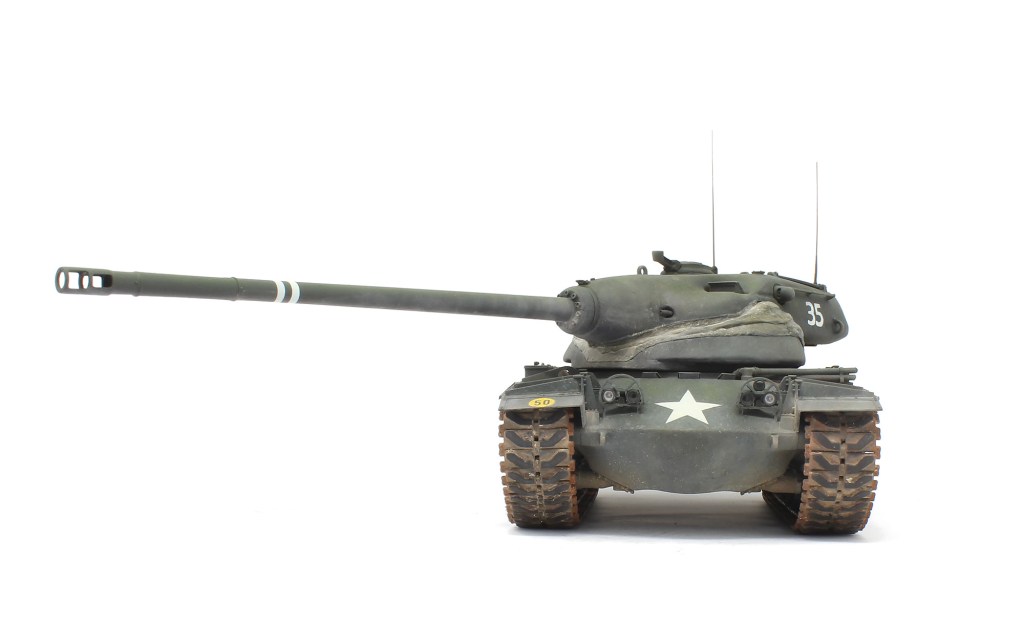
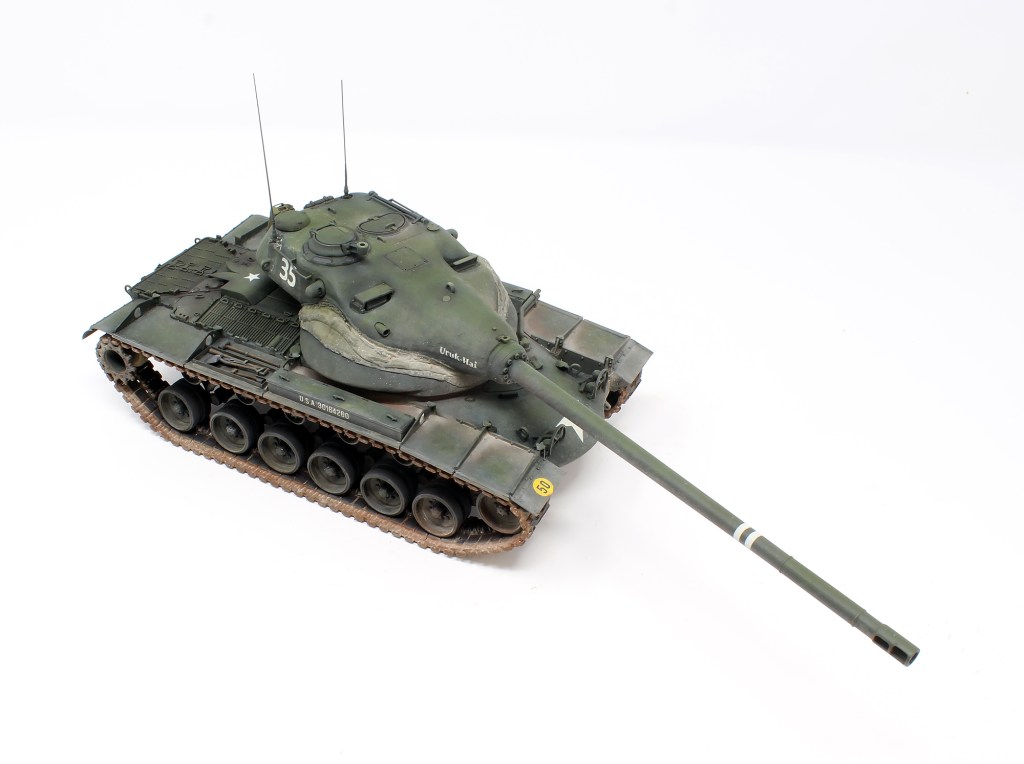
Like many armor fans out there, I’ve been playing World of Tanks, and like many modeling companies, Dragon took notice of the WoT craze and tried to cash in some of that enthusiasm by creating a couple of kits aimed specifically at the player/modeler. The T54E1 is one of those kits. It has this badass vibe to it that I find quite appealing, so I decided on a hunch to get one and build it as a quick side project.
The Kit

This is the first Black Label kit I build and, let’s be honest, I am not impressed. WTF happened Dragon? How did you get from being a company that produced some of the best kits I’ve built in the past to… this?
Okay, the kit is not beyond hope, but it has some very serious issues. The lower hull, based on their M48 line of kits, isn’t bad, except for the PE addition that is rather delicately attached. But the turret… OMG. It looks like an Eastern Express kit from the nineties. Details are super soft, especially around the commander cupola, and the shape of the turret on both sides is plain wrong. So wrong in fact, that it wouldn’t rotate prior to surgery. I have to wonder what went through the head of the guy who greenlit that turret.
I’ve fixed it somewhat, although my correction makes it only marginally better. I think there is a guy over at Missing Lynx who did a much better job fixing the turret.
Overall, this kit feels like a botched job on Dragon’s part. The travel lock doesn’t fold, and some of the engine deck details are dubious at best. Still, I found the project quite enjoyable because the subject matter is just so cool.


The Project
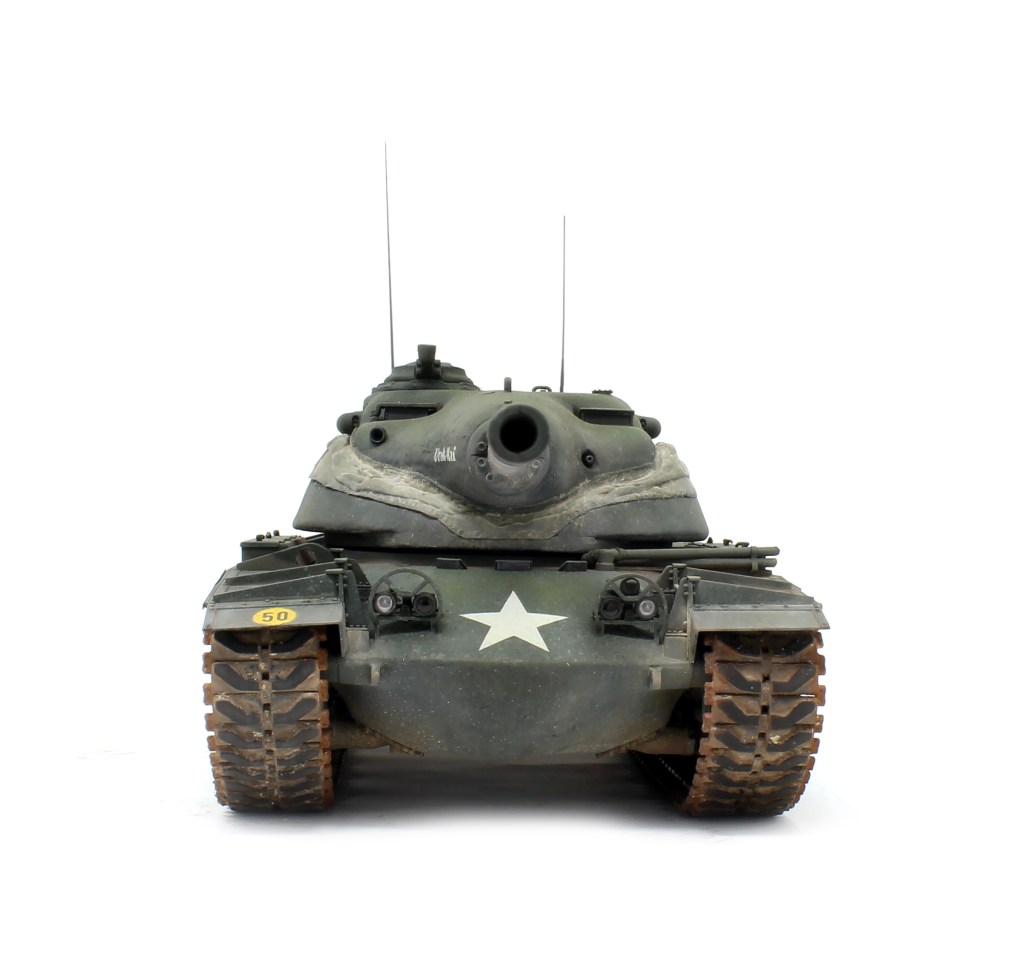
So my first idea was to do a literal World of Tanks vehicle, but as I went along I decided to simply do a sort of what-if service vehicle. Apart from the turret major surgery to get it closer to the real thing, I made a few additions and adjustments here and there, namely:
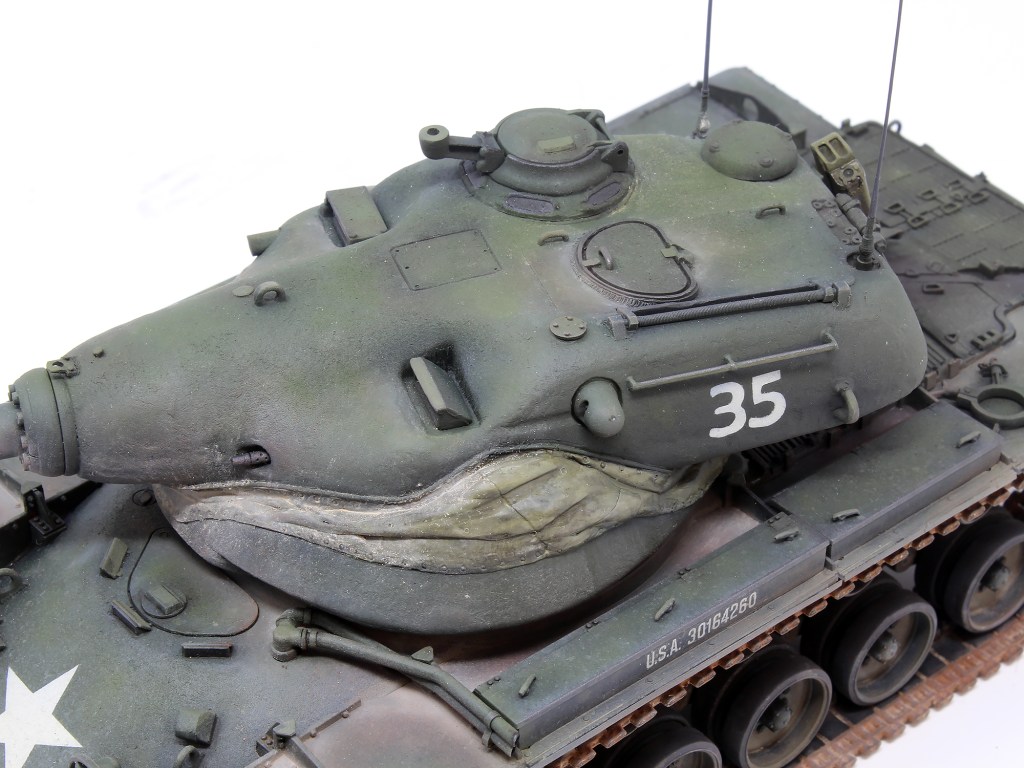
- Redid the protecting canvas from Green Stuff and added a rain rail at its top.
- Added more robust cast texture on the hull and turret using Tamiya putty diluted in tamiya
- Added a splash bar on the turret neck.
- Replaced the loader’s hatch with a part from… Tamiya’s super old M41.
- Replaced the port side access door’s spring. This part in particular was truly aweful on the kit.
- Added a coaxial .30 cal barrel protruding from the turret’s left cheek.
- Replaced the sponson toolboxes molded handles with actual handles from The New TMD.
- Added a jerrycan and strap set from The New TMD.
- Added some makeshift mount as if to enable the placement of a IR spotlight atop the mantlet, together with a covered and sealed shut cable opening next the lifting eye on top of the mantlet.

Honest Assessement
Things I’m Happy With
- Overall super happy with where I landed this build, even though I wasn’t quite sure where I was going exactly.
- Super happy as well with the dust work made out of pigments and the overall usage of pigments in a dry application.
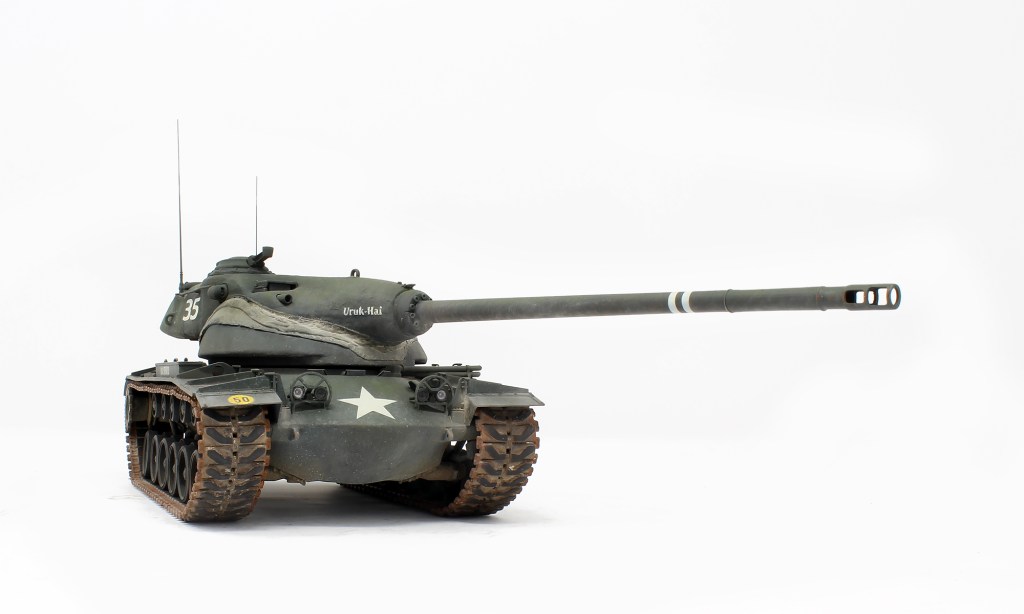
- Most markings made out of cut templates. The name of the tank was a bit fiddly to achieve.
Things I’m Okay With
- The DS tracks. These are actually waaaaay better than regular vinyl tracks, by a wide margin, but it remains a bit of a PITA to work with, especially when you need to handle them a lot, which was my case. But they indeed to react super well to styrene glue and gluing them together actually works perfectly and make for a pretty strong bond. This property also allow for adjusting the fit by simply gluing the tracks to the wheels, BUT I also ruined a link while gluing it to the sprocket. In the end though, they still look like the rubber bands that they are.
- Learned quite a bit working with enamel products.
- I really focused on contrasts to get some depths and relief on the build. The process wasn’t a really deliberate one however, but simply keeping that in mind really helped.
- The early cold war dark green typical of US vehicle isn’t so bad, but I’m not sure I’m being quite correct. Some M48 looks almost black under some lights.
- That canvas. At certain angle its got this super nice, drab and dusty feel to it. Super happy with that. But the sculpt is inconsistent.

Things that Could Be Better
- I did not know where I was going exactly in terms of weathering. I proceeded cautiously to avoid major blunders, but the process was inefficient at best, I had to fix minor issues I introduced myself because I was experimenting.
- I need to streamline the weathering process a bit more. Not to be too formulaic, but to be efficient. That’s why it helps to have a clear idea of where I’m going. It sounds so obvious. but it’s easy to get confused as to what you are trying to achieve.


Project Specs
Dragon T54E1 (ref #3560)
The New TMD U.S. Jerry Can Holders: with Jerry Cans and Straps (ref #35-70053)
The New TMD M1919 barrel (ref # AR0378)
The New TMD Sponson Boxes handle (ref #35-70021)
Some RB Models aerial, 1,4m and 2m I think.

The good thing about this model is that the T54E1 never entered service so your drab could be fresh out of the can if you wanted it to be. I feel you did a good job with a marginal kit.
LikeLike